![Boom Logo White.png]](https://www.bbdboom.com/hs-fs/hubfs/Boom%20Logo%20White.png?height=50&name=Boom%20Logo%20White.png)
Setting up the email tracking can be an important piece for any sales team using HubSpot. However, it does depend on whether you are using the HubSpot Sales Chrome Extension or the Outlook 365 add-in. If you are using the Outlook 365 add-in, skip to the second section of this article; but not before the next section regarding logging and tracking emails.
If you have neither, do not worry, follow the instructions below on how to set this up. If you are using Gmail then follow the Gmail set of instructions, however, if you’re using Outlook, follow the Outlook set of instructions.
Gmail:
- Click here to download the HubSpot Sales Chrome Extension. Once this has downloaded, locate your Gmail account and you’ll notice a HubSpot icon in your extension bar.
- Once you have completed the first step, read about the difference between logging and tracking emails and then move onto how to use the extension under the ‘HubSpot Sales Chrome Extension’ section below.
Outlook:
- Click here to download the HubSpot Sales Outlook Add-in from the Microsoft AppSource. Once this has downloaded, locate to your Outlook account and you’ll notice a HubSpot icon in the top bar.
- Once you have completed the first step, read about the difference between logging and tracking emails and then move onto how to use the extension under the ‘Outlook 365 add-in’ section below.
What’s the difference between logging and tracking emails?
So before you get started, it’s important to understand the difference between logging and tracking emails and how GDPR can affect how you do this. If you are unsure or worried about this section, reach out to your legal team for support.
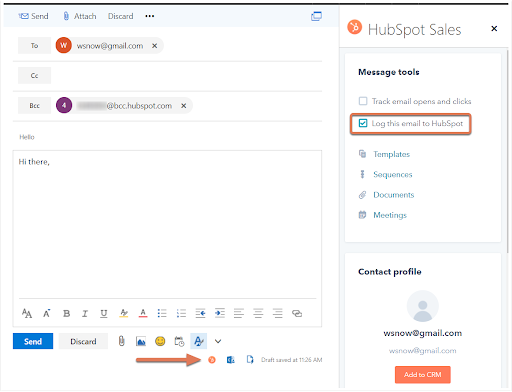
Logging an email: This is a record of the email between yourself and the recipient(s) that will sit within the activity timeline of that particular contact. So this could include any attachments that are sent within the email. The use of this feature is so that sales reps can record any communications between prospects within the contacts record for future use. This could be to notify another sales rep of the activity or to further understand where the contact is in the sales process. We at BBD Boom would recommend having this setting switched off as default and then choosing which emails get synced into HubSpot depending on who you are emailing.
Tracking an email: This is different to logging an email as this allows you to see when the recipient(s) has opened your email. This will sit underneath the recipient's name with the first status being ‘Tracked’ and then change to ‘Opens: ??’ as soon as any recipient has opened your email. It will also tell you how many times the email has been opened which can be useful when emailing prospects and understanding how keen they may be.
How to use the HubSpot Sales Chrome Extension:
1. Tracking Emails:
- Go to compose a new email and right before you go to send the email you’ll notice two tick-boxes under the subject line section.
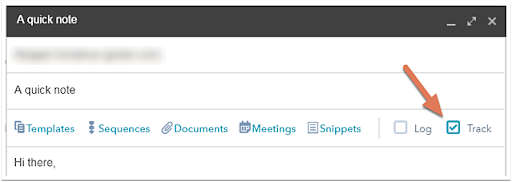
- Check the ‘Track’ tick-box and this will then track that particular email along with any responses from that same email thread.
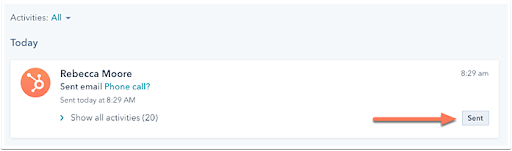
- To be able to see all activity, click the HubSpot icon in your Chrome extension bar.
- Within the activity timeline you’ll be able to see the email that was sent and it’s status, whether this is ‘Tracked’ or ‘Opens: ??’
2. Logging Emails:
- Similar to tracking your emails, right before you go to send an email, you’ll see the other tick box ‘Log’. If you check this, then the email will sync into HubSpot under the activity timeline of that contact.
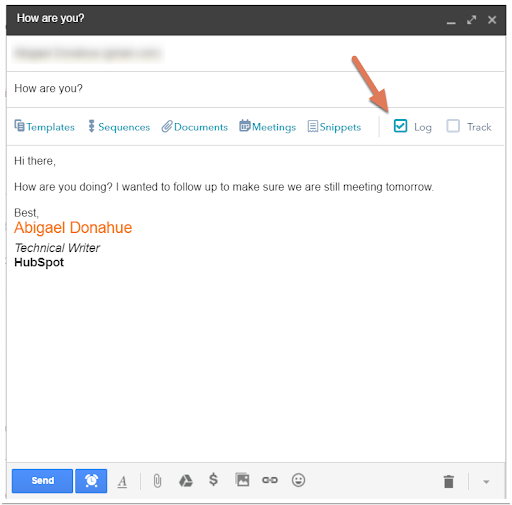
- To view this activity in HubSpot, locate to the contacts record to see the email you sent within their activity timeline.
How to use the Outlook 365 add-in:
It will depend on how you are using your Outlook account as to which instructions you should follow. If you are using the Outlook 365 add-in from Outlook Desktop on a PC or a Mac, then follow the ‘Outlook Desktop’ instructions. However, if you’re using your Outlook account on the web or an Outlook.com account, then follow the ‘Outlook Web’ instructions below.
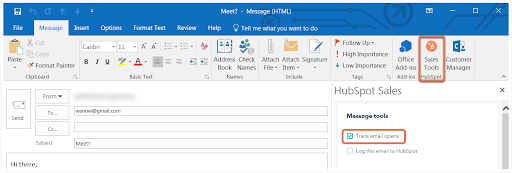
1. Outlook Desktop - Tracking Emails:
- Go to compose a new email and just before you send it, click on ‘Sales Tools HubSpot’ within the top panel. Here you’ll see two tick-boxes, check the tick-box ‘Track’ and this will then track that particular email along with any responses from that same email thread.
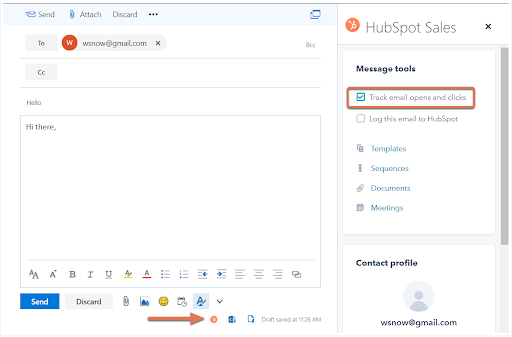
2. Outlook Web - Tracking Emails:
Go to compose a new email and just before you send it, you’ll notice the HubSpot icon in the bottom right hand corner. Click on the icon and you’ll see two tick-boxes, check the tick-box ‘Track’ and this will then track that particular email along with any responses from that same email thread.
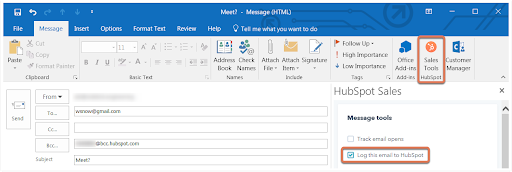
3. Outlook Desktop - Logging Emails:
- Similar to tracking emails, click on the ‘Sales Tools HubSpot’ within the top panel. Here you’ll see two tick-boxes, check the tick-box ‘Log’. This will then sync the email into HubSpot under the activity timeline of that contact.
4. Outlook Web - Logging Emails:
- Similar to tracking emails, click on the HubSpot icon in the bottom right hand corner and you’ll see two tick-boxes, check the tick-box ‘Log’. This will then sync the email into HubSpot under the activity timeline of that contact.